How to Strip Tile Sealer?
- Sinotiles
- 2026-05-29
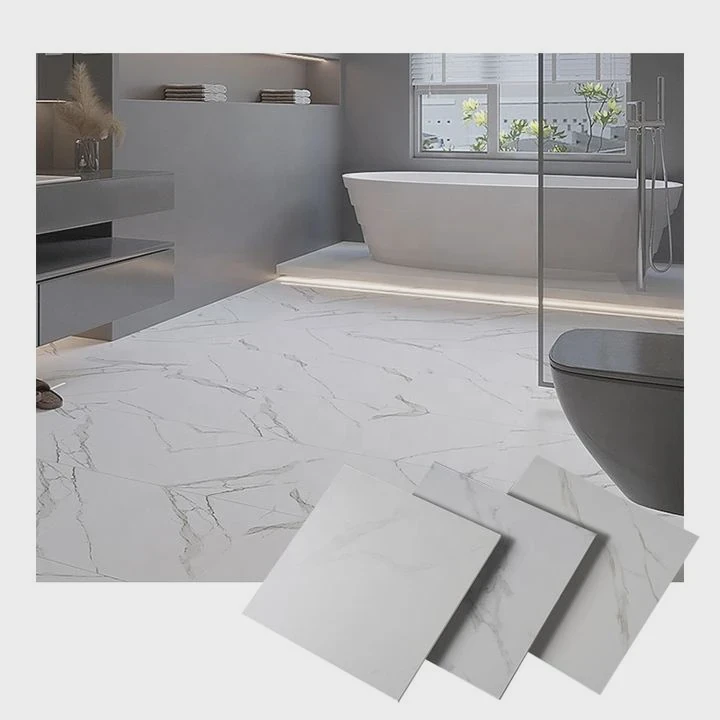
Old tile sealer can become cloudy, uneven, or difficult to clean. Many floors and walls lose their original appearance because of sealer buildup over time.
To strip tile sealer, use a suitable sealer remover, apply it evenly, scrub the surface carefully, and clean away residue completely before resealing or refinishing the tile.
Proper sealer removal helps restore the natural appearance of tiles and improves the performance of new sealers. Careful preparation and cleaning also help avoid surface damage during the process.
What Products Remove Tile Sealer Effectively?
Many people use harsh chemicals without checking tile compatibility first. This can damage tile surfaces, grout, or finishes permanently.
Tile sealer removers, alkaline cleaners, solvent-based strippers, and specialized degreasers are commonly used to remove old tile sealers safely and effectively.
Different tile sealers require different removal products. Some sealers are water-based, while others use solvent-based formulas. Choosing the correct remover helps improve cleaning efficiency and reduces damage risk.
Solvent-Based Sealer Removers
Solvent-based removers are often used for strong penetrating sealers.
These products help dissolve:
- Acrylic sealers
- Wax coatings
- Oil-based sealers
- Heavy surface buildup
They are commonly used on:
- Porcelain tile
- Natural stone
- Quarry tile
However, strong ventilation is usually necessary during application because of chemical fumes.
Alkaline Cleaners for Light Sealer Buildup
Alkaline cleaners work well for mild or water-based sealers.
Advantages include:
- Easier cleanup
- Lower odor
- Safer indoor use
- Reduced surface risk
These cleaners are often suitable for:
- Ceramic tile
- Residential floors
- Light sealer residue
Still, they may require repeated applications on older sealers.
Specialized Tile Sealer Strippers
Many manufacturers produce dedicated sealer stripping products.
These removers are designed to:
- Break down sealers
- Protect grout
- Reduce surface damage
- Improve cleaning speed
Professional contractors often prefer these products because they are made specifically for tile surfaces.
Degreasers Help Before Stripping
Heavy grease or soap residue can reduce stripper performance.
Degreasers help remove:
- Cooking oils
- Soap buildup
- Dirt layers
- Surface contaminants
Pre-cleaning improves contact between the remover and old sealer.
Different Tile Materials Need Different Products
Not all tiles react the same way to chemical removers.
| Tile Type | Recommended Product |
|---|---|
| Ceramic tile | Alkaline cleaner |
| Porcelain tile | Solvent-based remover |
| Natural stone | Stone-safe stripper |
| Quarry tile | Heavy-duty remover |
| Mosaic tile | Mild stripping solution |
Natural stone usually requires extra care because strong chemicals may damage the surface finish.
Test Small Areas First
Professional installers often test products before full application.
Testing helps check:
- Surface reaction
- Color changes
- Finish damage
- Cleaning effectiveness
This step reduces the risk of large-scale surface problems.
Why Product Selection Matters
Using the wrong remover may cause:
- Surface discoloration
- Tile damage
- Grout weakening
- Poor sealer removal
Correct product selection improves both safety and final cleaning results.
How Can Scrubbing Help Strip Old Sealers?
Many sealers do not dissolve completely with chemicals alone. Physical scrubbing often helps break down stubborn layers more effectively.
Scrubbing helps loosen old sealer residue, improve chemical penetration, and remove buildup from textured tile surfaces and grout lines.
Scrubbing is an important part of the stripping process. Even strong removers usually need mechanical action to fully lift old sealers from the tile surface.
Why Old Sealer Becomes Difficult to Remove
Over time, sealers harden and bond tightly to the tile.
This happens because of:
- Heat exposure
- Foot traffic
- Moisture
- Dirt buildup
- Multiple sealer layers
Older sealers often require stronger scrubbing effort.
Scrubbing Helps Break Surface Tension
When the surface is scrubbed:
- The sealer softens faster
- Removers penetrate deeper
- Residue loosens more easily
This improves overall stripping efficiency.
Use the Correct Scrubbing Tools
Different surfaces require different cleaning tools.
| Tool | Best Use |
|---|---|
| Nylon brush | Grout lines |
| White scrub pad | Delicate tile |
| Stiff brush | Heavy buildup |
| Floor buffer | Large commercial floors |
Soft tools reduce scratching risk on polished surfaces.
Grout Lines Need Extra Attention
Sealer buildup often remains inside grout joints.
Scrubbing grout helps:
- Remove trapped residue
- Improve surface appearance
- Prepare for resealing
Small brushes usually work best in narrow grout lines.
Mechanical Machines Improve Efficiency
Large projects often use powered equipment.
Examples include:
- Rotary floor machines
- Floor buffers
- Scrubbing pads
- Wet vacuums
These tools help reduce labor time in commercial spaces.
Avoid Excessive Force
Aggressive scrubbing may damage:
- Gloss finishes
- Polished surfaces
- Decorative tiles
- Soft natural stone
Controlled pressure usually creates safer results.
Repeat if Necessary
Some old sealers require:
- Multiple applications
- Additional scrubbing cycles
- Longer dwell times
Professional contractors often repeat the process until the surface feels completely clean.
Why Proper Scrubbing Improves Results
Good scrubbing helps:
- Remove stubborn residue
- Improve tile appearance
- Prepare surfaces for resealing
- Reduce uneven finish problems
This becomes especially important before applying new protective coatings.
Why Follow Instructions When Using Sealant Removers?
Many tile surfaces become damaged because chemical removers were used incorrectly. Ignoring instructions often creates safety risks and poor cleaning results.
Following product instructions helps prevent tile damage, improves stripping performance, and ensures safe handling of chemical sealant removers.
Tile sealer removers contain active chemicals that must be used carefully. Every product has different strength levels, dwell times, and application methods.
Different Products Work Differently
Some removers are:
- Water-based
- Solvent-based
- Gel formulas
- Heavy-duty strippers
Each type requires specific handling instructions.
Using the wrong method may reduce effectiveness.
Dwell Time Is Very Important
Most removers need time to soften the old sealer.
If removed too early:
- The sealer may remain attached
- Scrubbing becomes harder
- More chemical may be needed
If left too long:
- Surface damage may occur
- Residue may dry again
Manufacturers usually provide recommended dwell times for best results.
Ventilation Improves Safety
Strong chemical removers may release fumes.
Proper ventilation helps:
- Improve air quality
- Reduce odor buildup
- Improve worker safety
Open windows and fans are commonly used during indoor stripping projects.
Protective Equipment Matters
Professional installers often use:
- Gloves
- Eye protection
- Respirators
- Protective clothing
This reduces skin and eye exposure to chemicals.
Surface Compatibility Must Be Checked
Some products are unsafe for:
- Marble
- Limestone
- Polished stone
- Sensitive finishes
Reading instructions helps avoid accidental damage.
Incorrect Mixing Can Create Problems
Certain removers require dilution before use.
Too much concentration may:
- Damage grout
- Leave stains
- Affect tile finish
Too little concentration may reduce cleaning performance.
Disposal Instructions Are Important
Used stripping chemicals should not always be poured directly into drains.
Instructions may include:
- Proper disposal methods
- Waste handling guidelines
- Environmental precautions
Commercial projects often follow local disposal regulations carefully.
Why Professionals Follow Product Guidelines
Experienced contractors understand that instructions improve:
- Cleaning efficiency
- Surface protection
- Worker safety
- Final appearance
Careful product handling reduces project risks and expensive repairs.
Which Steps Ensure Proper Sealer Removal?
Many tile surfaces still feel sticky or uneven after stripping because the cleaning process was incomplete.
Proper sealer removal requires cleaning the surface, applying remover evenly, scrubbing thoroughly, removing residue completely, and allowing the tile to dry before resealing.
Complete sealer removal requires more than applying chemicals alone. Each step helps improve final surface quality and prepares the tile for future treatment.
Step 1: Clean the Tile Surface
Before applying stripper:
- Remove loose dirt
- Sweep dust
- Clean grease buildup
Pre-cleaning helps the remover contact the old sealer directly.
Step 2: Apply the Sealer Remover
Apply the remover evenly across the tile surface.
Avoid:
- Dry spots
- Uneven application
- Excessive pooling
Many professionals use brushes, rollers, or mops depending on the project size.
Step 3: Allow Proper Dwell Time
The remover needs time to soften the old sealer.
During this stage:
- Do not allow the product to dry fully
- Keep the surface evenly wet if required
This improves stripping performance.
Step 4: Scrub the Surface Thoroughly
Scrubbing helps break down:
- Hardened residue
- Multiple sealer layers
- Grout buildup
Focus carefully on:
- Corners
- Grout joints
- Textured surfaces
These areas often hold extra residue.
Step 5: Remove Residue Completely
After scrubbing:
- Wipe away dissolved sealer
- Rinse thoroughly
- Vacuum excess liquid if needed
Residue left behind may interfere with new sealer application later.
Step 6: Inspect the Surface
Professional installers usually check:
- Surface texture
- Remaining gloss
- Sticky residue
- Uneven appearance
Additional stripping may be necessary in some areas.
Step 7: Allow Full Drying
Tiles should dry completely before resealing.
Moisture trapped inside grout may weaken:
- New sealer adhesion
- Protective performance
- Final appearance
Drying time may vary depending on:
- Humidity
- Tile type
- Ventilation
Common Mistakes During Sealer Removal
| Mistake | Possible Problem |
|---|---|
| Skipping pre-cleaning | Weak stripper performance |
| Poor scrubbing | Remaining residue |
| Incomplete rinsing | Cloudy surface |
| No drying time | Poor resealing results |
| Using wrong product | Tile damage |
Avoiding these mistakes improves both surface appearance and long-term protection.
Conclusion
Removing old tile sealer requires the right products, careful scrubbing, and proper cleaning procedures. Following product instructions and completing every preparation step helps protect tile surfaces and creates better results before resealing or refinishing.