
Do It Yourself Tile Countertops?
- Sinotiles
- 2026-08-25
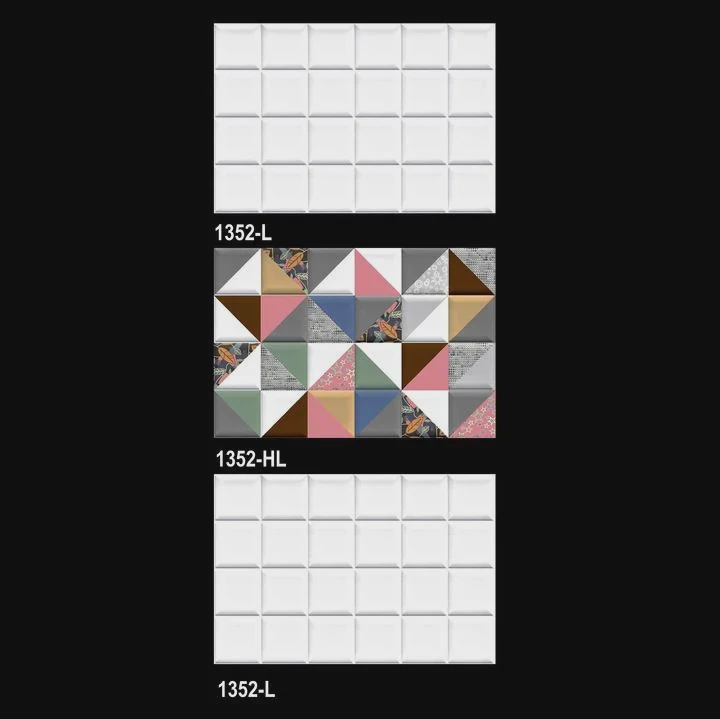
A DIY tile countertop looks simple, but small errors in the base, layout, cutting, or grout joints can quickly turn an affordable project into costly repair work.
Yes, you can build tile countertops yourself if you prepare a strong base, plan the tile layout, use the right tools, and follow correct setting methods. Good results depend on accurate measurements, a stable substrate, proper mortar coverage, clean grout joints, and enough curing time before regular use.
Tile countertops give homeowners a lot of freedom in color, size, pattern, and surface style. They can also be a practical choice when standard countertop materials do not fit the budget or room dimensions. Still, the finished tile is only one part of the job. I prefer to look at the countertop as a complete system. The cabinet, substrate, mortar, tile, grout, edges, and water protection all need to work together. Once these basic parts are understood, the project becomes much easier to control.
What Tools Are Required for DIY Countertops?
Using the wrong tools can make a simple tile job frustrating. Poor cuts, uneven mortar, and inaccurate measurements can remain visible long after the countertop is finished.
A DIY tile countertop usually requires a tape measure, level, square, pencil, tile cutter or wet saw, notched trowel, spacers, buckets, mixing tool, grout float, sponge, and safety equipment. The exact cutting and setting tools should match the tile material, thickness, size, and installation system.

A homeowner does not need a professional tile workshop to build a countertop. Still, a few correct tools make a major difference. I normally separate the tools into four groups: measuring tools, cutting tools, setting tools, and cleaning tools. This simple approach makes it easier to prepare everything before mortar is mixed.
Start With Accurate Measuring Tools
A tape measure is one of the most basic tools, but it also has one of the most important jobs. The countertop length, depth, sink position, wall position, and edge dimensions all need accurate measurements.
A carpenter’s square helps create straight reference lines. A spirit level or long straightedge helps check whether the countertop is flat. A pencil or removable marker can then be used to mark the tile positions.
Measurements should be checked more than once. Walls are not always perfectly straight. Cabinets can also be slightly out of square. A measurement taken only at one point may not show these differences.
Choose a Cutting Tool for the Tile
A manual tile cutter works well for many straight cuts, especially with common ceramic tiles. A wet saw is usually more useful when working with dense porcelain, thick tiles, large-format tiles, or complicated cuts.
The tile itself should be selected before the cutting equipment. I would not buy an expensive cutter first and then assume that it can handle every tile.
Sink openings and corners can need more detailed cuts. These areas deserve extra attention because a poorly cut tile can crack or leave an unattractive gap.
Prepare the Setting and Grouting Tools
A notched trowel spreads mortar across the substrate. The correct notch size depends on the tile and installation requirements. Tile spacers help maintain grout joint width. A grout float pushes grout into those joints after the tile has been set.
Clean buckets and sponges are also essential. Tile installation creates mortar residue and grout haze, so clean water should always be available.
| Tool | Main Purpose | Why It Matters |
|---|---|---|
| Tape measure | Measure countertop dimensions | Reduces cutting and layout errors |
| Carpenter’s square | Create straight reference lines | Keeps the layout aligned |
| Spirit level | Check level and flatness | Helps reduce uneven tiles |
| Tile cutter | Make straight cuts | Useful for many standard tiles |
| Wet saw | Cut hard or large tiles | Gives better control on difficult cuts |
| Notched trowel | Spread mortar | Helps achieve proper mortar coverage |
| Tile spacers | Control joint width | Keeps grout lines consistent |
| Grout float | Apply grout | Packs grout into joints |
| Sponge and buckets | Clean tile and grout | Helps control residue and haze |
| Safety glasses and gloves | Protect the installer | Reduces common work risks |
Safety glasses should be used during cutting because small tile pieces can break away from the cutting line. Gloves can also protect hands from sharp tile edges.
Extra tools do not automatically create better results. Correct tools are more important than having many tools. For a one-time DIY project, renting a good wet saw can make more sense than buying a cheap machine.
The main goal is simple. Every tool should help control measurement, cutting, mortar coverage, spacing, or cleaning. When all tools are ready before the work begins, the installation becomes much easier to manage.
How Can Beginners Plan Tile Layout Effectively?
A strong countertop can still look poorly made when the layout is wrong. Narrow cuts, uneven joints, and badly placed patterns become difficult to hide after the mortar cures.
Beginners should measure the entire countertop, mark reference lines, and dry-lay the tiles with spacers before applying mortar. The layout should account for front edges, walls, corners, sinks, appliances, grout joints, and tile patterns. Small changes to the starting position can create larger cuts and a more balanced appearance.

I consider dry layout one of the most useful steps in any tile countertop project. Mortar creates time pressure because the installer has a limited working period. A dry layout does not have that problem. Tiles can be moved many times until the arrangement works.
Measure the Actual Countertop
A countertop may look like a simple rectangle, but real installations are rarely perfect. A wall can move slightly inward or outward. A corner may not form a perfect 90-degree angle. A sink or cooktop can also change the available tile area.
The countertop should be measured at several points. Tile dimensions should also be checked.
Nominal tile size and actual tile size can sometimes differ. Grout joints also take up space. Ten tiles across a countertop do not simply equal ten times the width of one tile because the joints between them must also be included.
This is why a real dry row is often more useful than calculations alone.
Test the Front Edge First
The front edge is one of the most visible areas of a countertop. People also touch it every day.
A layout that leaves a very narrow tile strip along the front edge can look weak and awkward. It can also make installation harder.
Moving the first row slightly can create a larger piece at the front and a more balanced piece near the wall. The best layout does not always contain the greatest number of full tiles. It creates the most natural-looking distribution of cuts.
Plan Around the Sink
The sink area often creates the most difficult cuts. Thin tile sections beside an opening can be fragile.
I would dry-lay the tiles around the planned sink position before making final reference lines. The grout lines can sometimes be moved slightly so that the sink opening passes through stronger sections of tile.
The same idea applies to cooktops and other countertop openings.
Look at the Tile Pattern
Modern tiles can copy marble, stone, concrete, or wood. Many of these designs have a clear direction.
Several tiles should be placed next to each other before installation. The pieces can then be rotated until the veins or patterns look natural.
| Layout Area | What to Check | Problem to Avoid |
|---|---|---|
| Front edge | Cut size and edge position | Thin visible strips |
| Back wall | Final tile width | Uneven narrow cuts |
| Sink | Cut strength and position | Fragile tile sections |
| Corners | Joint alignment | Broken visual lines |
| Grout joints | Equal spacing | Rows moving out of alignment |
| Tile pattern | Vein and design direction | Repetitive appearance |
Reference lines can be marked after the dry layout is confirmed. These lines give the installer a fixed guide when mortar is applied.
A common beginner habit is starting with a full tile in one corner. This feels simple, but it can create a bad cut at the opposite side. A better starting point comes from testing the whole layout first.
Twenty or thirty minutes of dry planning can prevent several hours of difficult cutting and adjustment. It can also make a basic DIY countertop look much more controlled.
Why Is Substrate Selection Important Here?
An attractive tile cannot fix a weak countertop underneath it. Excess movement, moisture, or poor support can eventually cause loose tiles, cracked grout, and damaged edges.
The substrate matters because it creates the flat, rigid, and stable surface that supports the tile. A suitable countertop base should control movement, provide proper support, and work with the selected mortar and waterproofing system. Poor substrate preparation can cause cracking, lippage, bonding problems, and moisture damage.

The substrate disappears after the tile is installed, so it is easy to give most of the attention to the decorative surface. I see the hidden layers as the more important part of the project.
A countertop deals with daily loads. People place appliances, cookware, dishes, and other heavy objects on it. The surface also experiences spills and repeated cleaning. The base needs to remain stable during all of this use.
The Base Needs Enough Rigidity
Tile and grout are hard materials. They do not handle excessive bending well.
If the countertop moves when weight is applied, that movement can transfer into the tile layer. A grout joint may crack first. A tile can also crack or lose its bond.
The cabinet structure should be checked before the tile substrate is installed. Loose or weak cabinets should not be ignored.
The structural base and tile backer system should then follow the requirements of the products being used. One material or thickness should not be assumed to work for every installation.
Flatness Is Just as Important
A substrate can be strong but still be unsuitable if the surface is uneven.
High and low areas can cause one tile edge to sit above another. This difference is often called lippage. It affects appearance, but it can also make the countertop harder to clean and less comfortable to use.
Large tiles make flatness even more important. A small tile can sometimes follow minor changes in a surface. A large rigid tile cannot adjust as easily.
A long straightedge should be moved across the base in different directions. Any visible gaps or high points should be evaluated before installation begins.
Water Needs a Clear Plan
Kitchen and bathroom countertops often contain sinks. Water can reach joints, faucet openings, walls, edges, and other vulnerable points.
The installation should use a substrate and water-management method suitable for the application. Some backer boards resist moisture better than standard wood products. A waterproofing membrane may also be part of the system.
Product instructions should guide this decision because different systems have different requirements.
Mortar Must Work With the Substrate
The substrate, mortar, and tile are connected. The installer should not choose each product separately without checking compatibility.
Large-format porcelain may need a different setting approach from small ceramic tile. Proper mortar coverage is especially important on a working surface.
Empty areas below a tile can reduce support. The installer should periodically lift a tile while the mortar is still fresh and inspect the coverage.
A countertop system can include cabinet support, a structural base, tile backer, waterproofing, mortar, tile, grout, and edge treatment. Each layer has a separate job.
The substrate is not the part that guests will notice, but it strongly affects how the countertop performs after months and years of use. Extra preparation at this stage is usually easier than removing cracked tiles later.
Which Common Mistakes Should DIYers Avoid?
Most failed DIY countertops are not caused by one huge error. Several small shortcuts in measuring, preparation, mortar application, grouting, or curing usually create the bigger problem.
DIYers should avoid tiling over a weak or uneven base, skipping the dry layout, using unsuitable mortar, creating poor mortar coverage, making very narrow cuts, and rushing grout or curing. They should also follow product instructions for mixing, joint treatment, waterproofing, working time, cleaning, and final use.

The biggest mistake is often starting the visible work too soon. Installing tile feels productive. Measuring and checking the substrate does not create the same feeling. Still, the preparation stage often decides how easy the rest of the job will be.
Mistake 1: Assuming the Surface Is Flat
A countertop can look flat without actually being flat.
A long straightedge should be placed across the surface in several directions. High and low areas should be identified before mortar is applied.
Trying to correct major substrate problems while setting tile makes the job much harder. It can also create uneven mortar thickness.
Mistake 2: Skipping the Dry Layout
A beginner may start with a full tile in the easiest corner and continue across the countertop.
The problem often appears at the opposite wall. The remaining space may require a tiny strip of tile. The sink may also fall directly through a difficult part of the pattern.
A dry layout shows these problems before anything becomes permanent.
Mistake 3: Adding Too Much Water to Mortar
Mortar can feel difficult to spread, so adding more water may seem like an easy solution.
The manufacturer gives mixing ratios for a reason. Too much water can change the performance of the material. Mixing time, resting time, remixing, working time, and curing time should also be followed.
Mistake 4: Getting Poor Mortar Coverage
A tile may look secure from above while large empty areas remain underneath it.
The correct trowel size and technique help create better coverage. The installer should lift a newly placed tile from time to time to see what is happening below the surface.
Large tiles may need extra steps to achieve the required coverage.
Mistake 5: Forgetting About Grout Lines
Spacers help control joint width, but the installer should still watch the reference lines.
Small spacing errors can build up across several rows. The last row can then become noticeably crooked.
The surface should also be checked as each section is completed. A tile that sits too high should be corrected while the mortar is workable.
Mistake 6: Rushing Grout and Curing
A finished tile surface creates a strong temptation to start using the countertop immediately.
Mortar and grout need time to cure. Sealers and other materials can also have their own waiting periods. Water exposure or heavy use too early can affect the installation.
Grout cleanup needs patience as well. Too much water during cleaning can cause problems, while waiting too long can make grout haze difficult to remove.
Edges, wall connections, corners, sink openings, and other transition areas should receive special attention. These points often deal with water and movement.
I would also keep extra tiles from the same batch. Cutting errors happen. Tiles can break during installation. A future repair may also be needed. Replacement tiles purchased much later can have small differences in color, pattern, or size.
DIY tile countertop work rewards control more than speed. Each row should be checked for alignment, spacing, height, and mortar coverage. Difficult cuts should be tested before they are installed. The countertop does not need to be completed as fast as possible. It needs to remain strong, practical, and visually balanced after daily use begins.
Conclusion
A DIY tile countertop is manageable when the project starts with careful preparation. The right tools, balanced layout, rigid substrate, good mortar coverage, clean joints, moisture control, and proper curing all matter. Taking more time before and during installation can prevent many of the problems that are difficult to repair later.




