How to tile a bathroom shower?
- Sinotiles
- 2026-07-15
A shower area often fails when water leaks, tiles crack, or work looks uneven. Many people feel confused before starting this project, and mistakes can become expensive and hard to fix.
A clear method makes the work easier and safer. A proper plan helps control water, layout tiles evenly, and choose the right materials for long-lasting results.
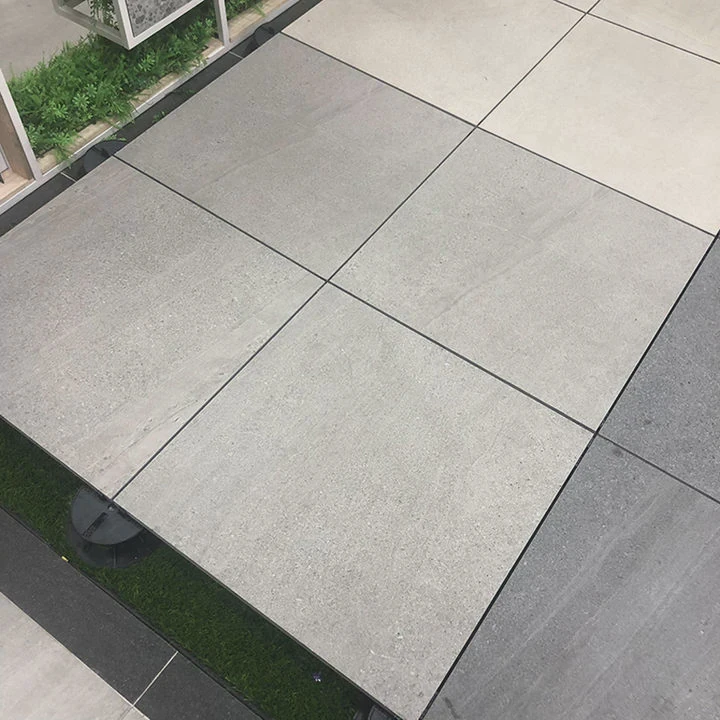
Most shower tiling success comes from three things: good surface preparation, correct waterproofing, and careful tile placement. Each step must stay simple and consistent.
What steps are required to tile a shower area?
Good shower tiling always follows a fixed order. Many failures come from skipping steps or doing them in the wrong sequence.
A structured workflow helps avoid cracks, leaks, and uneven surfaces. The process is not difficult, but it needs patience and accuracy.
Dive deeper
Shower tiling starts before any tile is placed. The first stage is surface preparation. The wall must be strong, clean, and flat. Any dust, oil, or loose material must be removed. If the surface is weak, cement board or backer board should be installed. This creates a stable base for tiles.
Next comes layout planning. The tile position should be marked on the wall. The goal is to avoid very small tile cuts at edges. A dry layout on the floor often helps to visualize the final result.
Waterproofing comes after preparation. A waterproof membrane must be applied on all wet zones. This step is very important because water damage can destroy the structure behind tiles.
After that, tile adhesive is mixed and applied. Tiles are fixed step by step, starting from the bottom or center line depending on design.
Grouting is the final step. Joints are filled, cleaned, and sealed.
Step checklist table
| Step | Action | Key Focus |
|---|---|---|
| 1 | Surface preparation | Clean and level base |
| 2 | Backer board installation | Stability and support |
| 3 | Waterproofing | Prevent water leakage |
| 4 | Layout marking | Even tile placement |
| 5 | Tile fixing | Strong adhesion |
| 6 | Grouting | Seal joints properly |
Each step depends on the previous one. If one step fails, the whole shower system can be affected. That is why patience matters more than speed in this process. A slow and careful approach always leads to a better result.
How do you ensure waterproofing before tiling?
Waterproofing is the most important part of a shower installation. Many tile problems come from water leaking behind the surface instead of the tile itself.
A proper waterproof system protects walls, floors, and structure from moisture damage. Without it, even the best tiles will fail over time.
Dive deeper
Waterproofing starts with checking the base. The surface must be fully dry and free from dust. Any cracks should be filled before applying waterproof layers. A smooth base helps the membrane stick better.
A liquid waterproof membrane or sheet membrane is usually applied. Both methods work, but liquid membrane is easier for complex shower shapes. It is brushed or rolled on the wall in multiple layers.
Corners and joints are the most sensitive areas. Special waterproof tape is often used there. These points are where water pressure is highest, so extra protection is needed.
After application, drying time must be respected. Rushing this step can cause weak spots in the waterproof layer. Once dry, a second layer is often applied for safety.
Water testing is also useful. A simple flood test can show if any leakage exists before tiling starts. This step can save a lot of repair work later.
Waterproofing comparison table
| Method | Strength | Ease of Use | Best Use Case |
|---|---|---|---|
| Liquid membrane | High flexibility | Easy | Complex shower shapes |
| Sheet membrane | Very strong barrier | Medium | Large flat walls |
| Cement waterproof coating | Moderate | Easy | Basic residential showers |
Good waterproofing is invisible after finishing, but it is the most important protection layer in the whole system. It decides how long the shower will last without problems.
Why use proper spacing for shower tiles?
Tile spacing may look like a small detail, but it affects both function and appearance. Poor spacing leads to cracks, uneven lines, and weak joints.
Correct spacing also allows movement in the structure. Bathrooms always have moisture and temperature changes, so tiles need small gaps to adjust safely.
Dive deeper
Tile spacers help keep equal distance between tiles. Without them, even a small error can grow across the wall and make the surface look uneven. A consistent pattern creates a clean and professional finish.
Grout lines are not just decorative. They also act as a buffer between tiles. When the building moves slightly, grout absorbs the pressure. Without proper spacing, tiles can push against each other and crack.
Different tile sizes need different spacing. Large tiles usually need smaller joints for a modern look. Small tiles or mosaics often need more visible spacing for balance.
Alignment also affects water flow. In showers, poor spacing can trap water in corners. Proper gaps help water move down naturally and reduce mold growth.
A simple spacer tool makes this process easier. It keeps every tile aligned while adhesive dries.
Spacing guidelines table:
| Tile Type | Recommended Gap | Result |
|---|---|---|
| Large format tiles | 2-3 mm | Clean modern look |
| Standard tiles | 3-5 mm | Balanced finish |
| Mosaic tiles | 2-4 mm | Flexible pattern support |
Good spacing also improves maintenance. Grout lines become easier to clean when they are consistent. This small detail directly improves long-term durability and appearance.
Which materials are best for shower installations?
Material choice decides how strong, safe, and long-lasting a shower will be. Low-quality materials often lead to early damage, even if installation looks good at first.
A shower system needs tiles, adhesive, waterproof layers, and grout that all work together.
Dive deeper
Tiles used in showers must resist water and stains. Porcelain tiles are one of the best choices because they absorb very little water. Ceramic tiles are also common and more budget-friendly.
Adhesive is another key material. A high-quality thin-set mortar is often used because it creates strong bonding between tile and wall. Poor adhesive can cause tiles to fall after some time.
Grout fills the gaps between tiles. Cement-based grout is common, but epoxy grout is stronger and more water-resistant. Epoxy is often used in high-end projects because it prevents mold growth better.
Waterproofing material has already been discussed, but its quality still depends on brand and application method. A weak membrane can fail even if tiles are perfect.
Backer boards like cement boards are used behind tiles. They resist water better than regular drywall and provide a stable base.
Material selection table
| Material | Type | Strength | Main Advantage |
|---|---|---|---|
| Tiles | Porcelain | Very high | Low water absorption |
| Adhesive | Thin-set mortar | High | Strong bonding |
| Grout | Epoxy | Very high | Mold resistance |
| Backer board | Cement board | High | Water resistance base |
Each material plays a role in the system. If one part is weak, the whole structure becomes unstable. That is why material selection must focus on balance, not just price.
Conclusion
Shower tiling success depends on correct steps, strong waterproofing, proper spacing, and quality materials. A careful system creates a durable and clean bathroom surface.