
Can I Install Vinyl Plank Flooring Over Tile?
- Sinotiles
- 2026-07-11

Many people want a new floor without the cost, dust, and time of removing old tile. A wrong choice can lead to uneven floors, damaged planks, and wasted money.
Yes, vinyl plank flooring can often be installed over tile if the existing tile is clean, stable, level, and free from major damage. Proper surface preparation and the right underlayment also help create a durable and attractive finished floor.
Installing vinyl plank over tile is a popular way to save time and reduce renovation costs. Still, success depends on more than simply placing new flooring on top of the old surface. The condition of the tile, the flatness of the floor, and the installation method all play important roles. Before starting the project, it helps to understand each step and avoid the common mistakes that can shorten the life of the new floor.
What Conditions Allow Vinyl Plank Over Tile Installation?
A beautiful vinyl plank floor starts with the condition of the tile below it. Even premium flooring cannot hide major problems under the surface.
Vinyl plank flooring can be installed over tile when the tile is firmly attached, structurally sound, clean, dry, and reasonably flat. Loose tiles, cracked sections, or severe height differences should be repaired before installation.
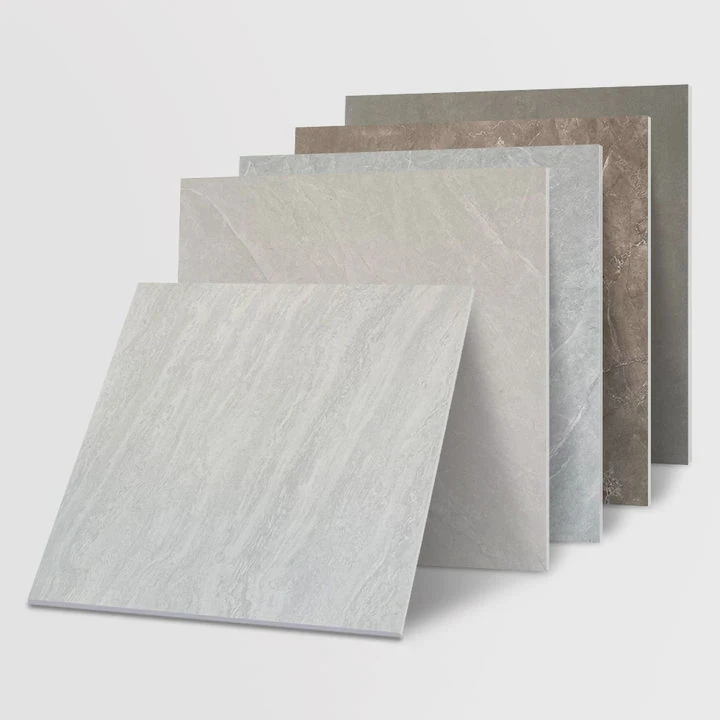
Many homeowners ask whether every tiled floor is suitable for vinyl plank flooring. The simple answer is no. The existing tile becomes the foundation for the new floor. If the base fails, the new flooring may also fail.
Check Tile Stability
Every tile should be firmly bonded to the subfloor. Loose or hollow-sounding tiles should be removed and repaired. Even floating vinyl planks rely on a stable base to keep the locking system secure.
Walk across the room carefully. Listen for hollow sounds and watch for movement. Small issues become much larger after installation.
Inspect Surface Damage
Minor chips usually do not create problems. Large cracks or broken tiles should be repaired because they may create pressure points beneath the vinyl planks.
If grout joints are deep, many installers recommend filling them with a floor patch or leveling compound. This reduces the chance that grout lines will become visible over time.
Moisture Matters
Moisture is another important factor. Bathrooms, kitchens, and basements should be checked carefully. Water trapped beneath flooring can cause mold or weaken adhesives.
The floor should always be completely dry before installation begins.
Existing Floor Height
Adding another flooring layer increases the finished floor height. This may affect:
| Area | What to Check |
|---|---|
| Doors | Make sure doors still open freely. |
| Cabinets | Confirm appliance clearance. |
| Stairways | Check step height consistency. |
| Transitions | Plan transition strips between rooms. |
Think Beyond Today
One lesson learned from many renovation projects is that shortcuts rarely save money. Spending extra time inspecting the existing tile often prevents expensive repairs later.
Some older tile floors remain perfectly solid after decades of use. Those floors often provide an excellent base for luxury vinyl planks. On the other hand, newer tile that was poorly installed may require repairs before covering it.
Looking at the floor as a complete system instead of only focusing on the vinyl planks usually leads to better long-term results.
How Should Tile Surfaces Be Prepared Beforehand?
Even the best vinyl plank flooring performs poorly on a dirty or damaged surface. Good preparation creates the foundation for a long-lasting installation.
Before installing vinyl plank flooring, clean the tile thoroughly, repair damaged areas, fill deep grout joints if necessary, remove grease and debris, and ensure the surface is completely dry before laying the new floor.

Preparation often determines whether a floor lasts five years or twenty years.
Remove Dirt and Grease
Tile floors collect wax, soap residue, oils, and dust over many years.
These materials reduce adhesive performance and may prevent proper plank seating.
Clean using an appropriate floor cleaner and rinse thoroughly. Allow the floor to dry completely before continuing.
Repair Problem Areas
Preparation includes fixing:
- Loose tiles
- Broken tiles
- Missing grout
- Cracked grout
- Surface holes
Ignoring these defects can create visible imperfections after installation.
Fill Deep Grout Lines
Some ceramic tiles have grout joints several millimeters deep.
Luxury vinyl flooring is flexible. Over time, these low areas may telegraph through the finished floor.
Many installers use a cement-based floor patch or embossing leveler to create a smoother surface.
Sand Glossy Surfaces When Needed
Highly polished tile may reduce adhesive bonding for glue-down vinyl planks.
Light sanding improves surface grip without removing the tile.
Always remove sanding dust before installation.
Final Inspection
Before opening the flooring boxes, inspect the room one final time.
Ask several simple questions:
- Is every tile secure?
- Is the floor clean?
- Is moisture completely gone?
- Are grout joints properly filled?
- Is every repair fully cured?
This final inspection usually takes only a few minutes but helps prevent costly mistakes.
Small Details Create Better Results
Many experienced installers say preparation takes almost as much time as laying the flooring itself.
That statement often surprises first-time homeowners.
The installation appears easy because the preparation work has already solved most problems.
Skipping preparation may save a few hours today, but it often creates visible imperfections that remain for many years.
Why Ensure the Floor Is Level Before Installing?
Many flooring problems begin below the surface. Even strong locking systems cannot overcome an uneven foundation.
A level and flat floor helps vinyl planks lock together correctly, reduces movement, prevents joint separation, improves appearance, and increases the overall lifespan of the flooring.

People often confuse “level” with “flat.”
For vinyl plank flooring, flatness usually matters more than perfect level.
Flat Floors Protect Locking Systems
Floating vinyl planks depend on precision locking edges.
High spots place pressure on the joints.
Low spots allow movement.
Repeated walking eventually weakens the connections.
Uneven Floors Create Visible Problems
An uneven tile floor may cause:
| Floor Condition | Possible Result |
|---|---|
| High spots | Planks rock when walked on |
| Low spots | Flexing and movement |
| Deep grout lines | Surface pattern may appear |
| Large dips | Joint separation |
| Raised tiles | Premature wear |
Follow Manufacturer Flatness Requirements
Most flooring manufacturers specify maximum floor variation over a certain distance.
Checking these requirements before installation helps maintain warranty coverage.
A long straightedge quickly identifies low and high spots.
Correcting Uneven Areas
Several repair options exist:
Self-Leveling Compound
This works well for larger low areas and creates a smooth finished surface.
Floor Patching Compound
Ideal for smaller repairs around damaged tiles or grout joints.
Grinding High Spots
Concrete grinders can remove small high areas without replacing the tile.
Better Appearance for Years
An attractive floor depends on more than plank color.
Smooth installation creates:
- Better seam alignment
- Less movement
- Lower noise
- Longer service life
- More professional appearance
One renovation project taught an important lesson after a floor was installed over uneven tile without proper leveling.
The installation looked perfect on the first day.
Several months later, walking paths began showing slight movement. Small gaps appeared between some planks. The flooring itself was not defective. The uneven base underneath caused the problem.
That experience shows why careful floor leveling should never be skipped.
Which Underlayment Options Improve Installation Results?
Many people wonder whether underlayment is necessary when installing vinyl plank flooring over tile. The answer depends on the flooring product and the condition of the existing floor.
The best underlayment depends on the vinyl plank type. Attached pad flooring may not need additional underlayment, while foam, cork, or specialized vapor barrier products can improve comfort, sound reduction, and moisture protection when appropriate.
Choosing the correct underlayment starts with understanding the flooring manufacturer’s recommendations.
Attached Pad Flooring
Many luxury vinyl planks already include an attached backing.
Adding another soft underlayment may interfere with the locking system and reduce stability.
Always read the manufacturer’s installation guide before purchasing extra materials.
Foam Underlayment
Foam products provide:
- Slight cushioning
- Noise reduction
- Minor surface smoothing
They work best where manufacturers specifically approve their use.
Cork Underlayment
Cork offers several advantages:
- Better sound absorption
- Improved walking comfort
- Natural material
- Some thermal insulation
It is commonly used in apartments or multi-story homes where noise control matters.
Vapor Barriers
Concrete slabs may require moisture protection.
Some underlayments include integrated vapor barriers, while others require separate plastic sheeting.
This becomes especially important in basements and ground-floor installations.
Choosing the Right Option
The correct choice depends on several factors.
Consider:
- Existing tile condition
- Room location
- Moisture level
- Flooring type
- Manufacturer requirements
Buying the most expensive underlayment does not always produce the best results.
Compatibility matters more than thickness.
Underlayment Is Not a Repair Material
A common misunderstanding is that underlayment can fix major floor problems.
It cannot.
Underlayment improves comfort and performance, but it does not replace proper surface preparation or floor leveling.
Large dips, cracked tile, loose flooring, or significant height differences should always be repaired first.
Once the tile surface is solid, clean, flat, and dry, the right underlayment can add another layer of performance and comfort that helps the vinyl flooring last even longer.
Conclusion
Vinyl plank flooring can be installed over tile when the existing floor is stable, clean, dry, and flat. Careful preparation, proper leveling, and selecting the correct underlayment all work together to create a durable floor that looks great and performs well for many years.
- Pre: How to Lay Shower Tile?
- Next: How to Cut Bathroom Tile?


