
How to Install Tile on Drywall?
- Sinotiles
- 2026-06-08

Many people want to tile over drywall but worry about cracks, moisture, and long-term failure. A small mistake during preparation can lead to expensive repairs later.
Yes, tile can be installed on drywall when the wall is in good condition, properly sealed, and located in a suitable area. The key is to prepare the surface correctly, protect it from moisture, and choose the right tile and adhesive system.
Many tile projects fail because people focus only on the tile itself. In reality, the condition of the drywall, the sealing process, and moisture control are just as important. Understanding these factors helps create a stronger and longer-lasting installation.
What Conditions Make Drywall Suitable for Tiling?
A damaged wall can ruin even the most expensive tile installation. Many homeowners and contractors overlook drywall quality until problems appear after installation.
Drywall is suitable for tiling when it is clean, flat, structurally sound, securely attached to framing, and located in an area with limited moisture exposure.

Before any tile installation begins, the first task is evaluating the drywall itself. A strong tile installation always starts with a strong substrate.
Check Structural Stability
Drywall must be firmly attached to wall studs. Loose panels can move over time. Even small movement may cause grout cracks or tile failure.
I always check for:
- Loose screws
- Visible movement
- Soft spots
- Cracks near joints
- Water damage marks
If any of these problems exist, repairs should be completed before tiling begins.
Ensure the Surface Is Flat
Tiles perform best on flat surfaces. Uneven drywall creates lippage, where tile edges sit at different heights.
A long straightedge can help identify:
| Inspection Item | Acceptable Condition |
|---|---|
| Wall flatness | Minimal variation |
| Screw heads | Flush with surface |
| Joint areas | Smooth and level |
| Surface texture | Light and uniform |
| Damage spots | Repaired completely |
Large-format tiles require even greater wall flatness because imperfections become easier to notice.
Avoid Water-Damaged Drywall
Drywall that has absorbed water often loses strength. Signs include:
- Stains
- Swelling
- Mold growth
- Soft paper facing
Any damaged section should be removed and replaced before tile installation.
Consider the Installation Location
Not every drywall location is suitable for tile.
Drywall generally works well in:
- Kitchen backsplashes
- Decorative feature walls
- Fireplace surrounds
- Dry bathroom walls
Extra protection is needed in:
- Shower areas
- Steam rooms
- Wet rooms
In these locations, cement board or specialized waterproof systems often provide better performance.
Evaluate Weight Capacity
Tile adds significant weight to a wall. Heavy stone tiles create more load than standard ceramic products.
Before installation, I consider:
- Tile size
- Tile thickness
- Adhesive weight
- Long-term wall stability
Modern drywall installed correctly can support many tile applications, but excessive weight should always be reviewed carefully.
Understand Long-Term Performance
Many successful tile projects last for decades because preparation was done correctly. A suitable drywall surface provides:
- Stable bonding
- Reduced cracking
- Better appearance
- Longer service life
The wall behind the tile may never be seen again after installation, but its condition determines whether the finished project succeeds or fails.
How Should Drywall Be Sealed Beforehand?
Many tile failures happen because people install directly onto untreated drywall. The wall may look acceptable, but hidden moisture absorption can create future problems.
Drywall should be cleaned, repaired, primed, and sealed with an appropriate primer or waterproofing product before tile installation to improve adhesion and reduce moisture absorption.

Proper sealing creates a stronger bond between the wall and tile system. It also helps control moisture movement through the drywall.
Start with Thorough Cleaning
Dust is one of the biggest enemies of tile adhesion.
Before sealing, I remove:
- Construction dust
- Grease
- Dirt
- Loose paint
- Debris
A clean surface allows primers and sealers to bond properly.
Repair Surface Imperfections
Every crack, dent, and hole should be repaired before sealing.
Common repairs include:
- Filling screw holes
- Patching dents
- Repairing joints
- Sanding rough areas
The goal is creating a smooth and consistent surface.
Apply a Suitable Primer
Primer serves several purposes:
- Reduces drywall porosity
- Improves adhesive grip
- Creates uniform absorption
- Enhances durability
Different manufacturers recommend different primers, so product instructions should always be followed.
Use Waterproofing in Sensitive Areas
Areas exposed to moisture benefit from waterproofing membranes.
Common waterproofing options include:
| Protection Method | Typical Application |
|---|---|
| Acrylic primer | Dry interior walls |
| Waterproof membrane | Bathrooms |
| Liquid waterproof coating | Splash-prone areas |
| Sheet membrane system | High-moisture environments |
| Vapor barrier systems | Specialized installations |
These systems help prevent water from reaching the drywall core.
Allow Proper Drying Time
One mistake I often see is rushing the process.
Every primer or waterproof coating needs adequate curing time. Installing tile too early can weaken adhesion and reduce performance.
Manufacturers usually provide:
- Drying times
- Temperature requirements
- Humidity recommendations
- Recoat intervals
Following these guidelines improves installation quality.
Create a Consistent Surface
Drywall contains areas with different absorption rates.
For example:
- Joint compound absorbs differently than paper facing.
- Repaired sections absorb differently than original surfaces.
Proper sealing creates a more uniform substrate, allowing adhesive to cure evenly.
Think Beyond Installation Day
A good sealer does more than help with installation. It also contributes to:
- Longer tile life
- Better moisture resistance
- Reduced maintenance
- Improved appearance
Spending extra time on sealing often prevents major repairs later.
Why Is Moisture Protection Necessary Here?
Water is one of the most common causes of tile installation failure. Many walls appear dry on the surface while moisture slowly damages the structure behind the tile.
Moisture protection is necessary because drywall is vulnerable to water absorption, which can cause swelling, mold growth, adhesive failure, and tile damage over time.

Understanding how moisture affects drywall helps explain why protection is such an important part of the installation process.
Drywall Is Not Naturally Waterproof
Standard drywall contains a gypsum core covered by paper.
When water enters the system:
- Paper absorbs moisture
- Gypsum softens
- Structural strength decreases
Over time, these changes can compromise the entire tile installation.
Moisture Often Travels Invisibly
One challenge with moisture is that damage may not appear immediately.
Water can move through:
- Grout joints
- Small cracks
- Fixture penetrations
- Wall connections
Months may pass before visible signs develop.
Mold Growth Can Become a Serious Issue
Moisture trapped behind tile creates conditions where mold may grow.
Common warning signs include:
- Musty odors
- Discoloration
- Soft wall areas
- Indoor air concerns
Prevention is far easier than remediation.
Wet Areas Require Extra Attention
Different spaces carry different moisture risks.
Low-risk areas:
- Living rooms
- Hallways
- Feature walls
Moderate-risk areas:
- Kitchen backsplashes
- Laundry rooms
High-risk areas:
- Shower walls
- Steam rooms
- Wet zones
Each environment requires an appropriate level of moisture protection.
Water Can Affect Adhesive Performance
Tile adhesive relies on stable bonding conditions.
When drywall becomes wet:
- Bond strength may decrease
- Movement may increase
- Grout may crack
- Tiles may loosen
Even high-quality tile products cannot compensate for severe substrate deterioration.
Long-Term Cost Considerations
Moisture damage often remains hidden until repairs become expensive.
Possible repair costs may involve:
- Tile removal
- Drywall replacement
- Mold treatment
- Reinstallation labor
Investing in moisture protection during installation is usually far less expensive than repairing a failed system later.
A Real-World Perspective
Many successful tile installations share one common feature: moisture management was considered from the beginning.
When evaluating a project, I always ask:
- How much water exposure will occur?
- How often will moisture be present?
- What level of protection is required?
These answers guide the selection of primers, membranes, and installation methods.
Moisture protection is not an optional upgrade. In many cases, it is a fundamental requirement for long-term performance.
Which Tile Types Work Best on Drywall?
Choosing the wrong tile can create installation challenges even when the drywall is prepared correctly. Weight, size, and moisture exposure all influence the best choice.
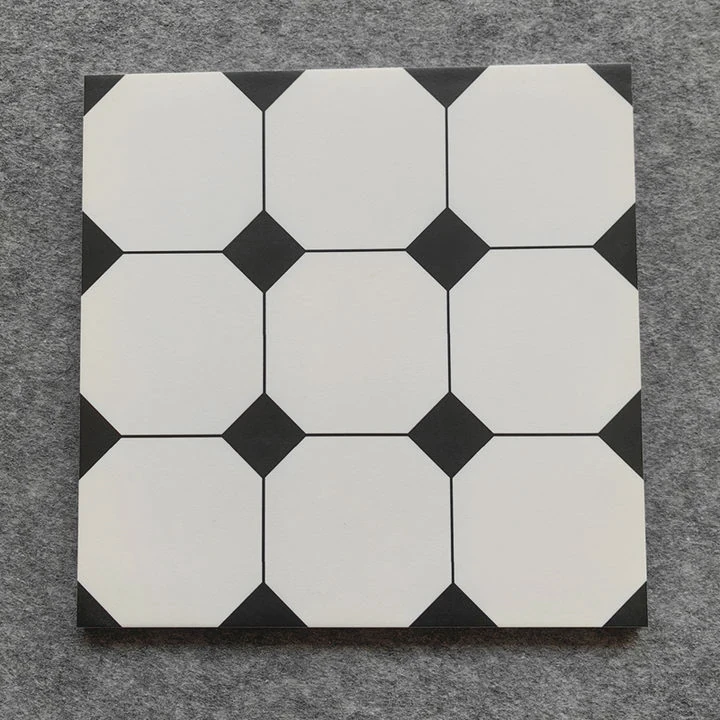
Ceramic, porcelain, mosaic, and many glazed wall tiles work very well on drywall because they offer manageable weight, strong adhesion, and reliable long-term performance in interior applications.
The best tile selection depends on both the wall condition and the intended use of the space.
Ceramic Tile
Ceramic tile remains one of the most popular choices for drywall installations.
Benefits include:
- Lightweight design
- Easy installation
- Wide style selection
- Competitive pricing
Ceramic products work especially well for kitchen backsplashes and decorative walls.
Porcelain Tile
Porcelain tile offers greater density and durability.
Advantages include:
- Lower water absorption
- Better wear resistance
- Long service life
- Premium appearance
Many modern residential and commercial projects use porcelain because it combines aesthetics with performance.
Mosaic Tile
Mosaic tile adapts well to drywall surfaces.
Common applications include:
- Accent walls
- Decorative borders
- Backsplashes
- Feature installations
The smaller pieces help accommodate minor surface variations.
Large-Format Tiles
Large-format porcelain and ceramic tiles have become increasingly popular.
These products create:
- Fewer grout joints
- Cleaner visual appearance
- Modern design aesthetics
However, wall flatness becomes more important when tile sizes increase.
Natural Stone Considerations
Natural stone can sometimes be installed on drywall, but additional evaluation is needed.
Factors include:
- Weight
- Thickness
- Moisture exposure
- Structural support
Heavy stone installations may require stronger substrate systems.
Matching Tile to Project Needs
Different tile categories serve different purposes.
| Tile Type | Best Use |
|---|---|
| Ceramic tile | Backsplashes and decorative walls |
| Porcelain tile | Bathrooms and high-traffic areas |
| Mosaic tile | Accent designs and curved surfaces |
| Large-format tile | Modern interior walls |
| Natural stone | Premium decorative applications |
Design and Performance Together
Many buyers focus only on appearance. A better approach combines design with technical performance.
Questions I often consider include:
- Is the wall dry or humid?
- How much cleaning will occur?
- What style does the project require?
- How much weight will the wall support?
The answers help narrow the most suitable tile options.
Why Porcelain Often Stands Out
For many projects, porcelain provides one of the best balances between beauty and durability.
It offers:
- Consistent quality
- Excellent strength
- Moisture resistance
- Wide design variety
Modern porcelain collections can replicate stone, marble, wood, concrete, and many other surfaces while maintaining reliable performance.
Selecting the right tile is not only about appearance. The best results come from matching tile characteristics with the conditions of the drywall and the demands of the environment.
Conclusion
Installing tile on drywall can be highly successful when the wall is sound, properly sealed, protected from moisture, and paired with suitable tile products. Careful preparation creates a stronger installation, improves durability, and helps maintain an attractive finish for many years.


