
how to install a tile floor in bathroom?
- Sinotiles
- 2026-04-11
Installing a bathroom tile floor often feels confusing. Many people worry about uneven tiles, water damage, or costly mistakes that show up later.
The key to installing a bathroom tile floor is proper surface preparation, waterproofing, correct material selection, and careful timing during tiling and sealing.
Many projects fail not because of bad tiles, but because small steps are skipped. So it is worth slowing down and understanding each stage clearly before starting.
What steps ensure proper bathroom floor tiling?
Bathroom tiling can go wrong fast. Uneven surfaces, loose tiles, or poor layout often lead to cracks and water issues later.
Proper bathroom tiling requires surface leveling, accurate layout planning, correct adhesive use, and consistent tile spacing to ensure durability and visual alignment.
A successful tile installation starts long before the first tile touches the floor. Many beginners rush into laying tiles without preparing the base. This is the main reason tiles fail over time.
Surface Preparation Matters Most
The subfloor must be:
- Clean
- Dry
- Level
- Structurally stable
Even a small dip can cause tiles to crack. A self-leveling compound can fix uneven areas.
Plan the Layout First
Before applying adhesive, dry-lay the tiles:
- Start from the center
- Avoid small cuts at edges
- Keep symmetry in mind
This step helps reduce waste and improves the final look.
Adhesive and Placement
Use the correct thin-set adhesive. Spread it evenly with a notched trowel. Then press each tile firmly into place.
Keep spacing consistent using tile spacers.
Key Tiling Steps Overview
| Step | Purpose | Common Mistake |
|---|---|---|
| Surface leveling | Prevent cracks | Ignoring uneven base |
| Dry layout | Improve alignment | Skipping planning |
| Adhesive application | Ensure bonding | Using wrong thickness |
| Tile spacing | Maintain uniform gaps | Inconsistent spacing |
Focus on Alignment
Check alignment every few rows. Do not wait until the end. Small shifts early can become big problems later.
In many projects, patience during these early steps decides the final quality. Taking time here saves repair costs later.
How do you waterproof bathroom floors before tiling?
Water damage is the silent problem in bathrooms. Many floors look perfect on the surface but fail underneath due to poor waterproofing.
Waterproofing involves applying a waterproof membrane or coating over the subfloor to prevent moisture from penetrating and damaging the structure.
Waterproofing is not optional. It is a core step in bathroom construction. Skipping it can lead to mold, structural damage, and tile failure.
Types of Waterproofing Systems
There are two common methods:
1. Liquid Waterproof Membrane
- Applied with roller or brush
- Forms a seamless coating
- Easy for small projects
2. Sheet Membrane
- Installed in layers
- More durable
- Better for large or commercial spaces
Critical Areas to Protect
Focus on:
- Floor corners
- Wall-floor joints
- Around drains
These areas are most prone to water leakage.
Waterproofing Process
- Clean the surface
- Apply primer if needed
- Add membrane layer
- Reinforce joints with tape
- Apply second coat
Let it dry fully before tiling.
Waterproofing Comparison
| Method | Ease of Use | Durability | Best For |
|---|---|---|---|
| Liquid membrane | Easy | Medium | Small bathrooms |
| Sheet membrane | Moderate | High | Large or commercial areas |
Common Mistakes
- Applying uneven layers
- Skipping corners
- Not allowing proper drying time
A project once failed because waterproofing was rushed. Tiles looked perfect, but water seeped through within months. Fixing it required removing everything.
This step is invisible but critical. A good waterproof base ensures long-term performance.
Which materials are best for moisture resistance?
Bathrooms face constant humidity and water exposure. Choosing the wrong materials can lead to stains, mold, or tile damage.
Porcelain tiles, glazed ceramic tiles, and low-absorption materials are best for moisture resistance in bathroom flooring.
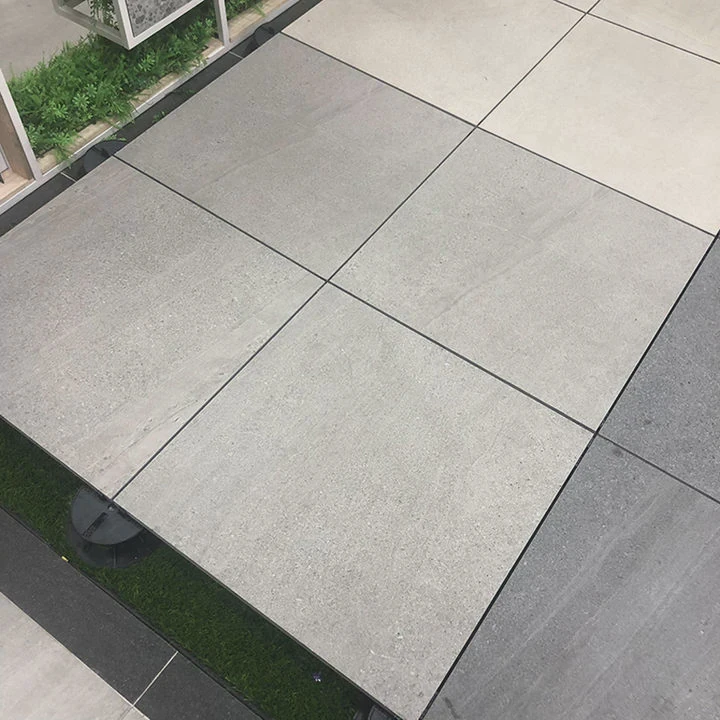
Material choice affects not only durability but also maintenance and safety.
Best Tile Options
Porcelain Tiles
- Very low water absorption
- High strength
- Suitable for heavy use
Glazed Ceramic Tiles
- Water-resistant surface
- Cost-effective
- Wide design options
Natural Stone (with sealing)
- Elegant look
- Requires maintenance
- Needs sealing regularly
Slip Resistance Matters
Bathroom floors must not be slippery.
Look for:
- Matte finish
- Textured surfaces
- Anti-slip ratings
Material Comparison
| Material | Water Resistance | Maintenance | Cost Level |
|---|---|---|---|
| Porcelain | Excellent | Low | Medium |
| Ceramic | Good | Low | Low |
| Natural stone | Moderate | High | High |
Beyond Tiles
Also consider:
- Waterproof adhesives
- Mold-resistant grout
- Flexible sealants
All materials must work together as a system.
Real-World Consideration
Some buyers focus only on design. But in humid regions, performance matters more. A beautiful tile that absorbs water will fail quickly.
A balanced choice combines:
Aesthetic appeal
Technical performance
Long-term durability
When should grout and sealant be applied?
Many people rush to finish tiling quickly. But applying grout or sealant too early can ruin the entire installation.
Grout should be applied after tile adhesive fully cures, usually after 24 hours, and sealant should be applied after grout dries to protect against moisture and stains.
Timing is critical in this stage. Each layer must set properly before moving to the next.
Grouting Process
After tiles are fixed:
- Wait at least 24 hours
- Remove spacers
- Apply grout evenly
- Fill all joints
- Clean excess grout
Let grout cure properly.
Sealant Application
Sealant is used for:
- Edges
- Corners
- Around fixtures
Apply it after grout dries completely.
Why Timing Matters
If grout is applied too early:
- Tiles may shift
- Adhesive may weaken
If sealant is skipped:
- Water can enter joints
- Mold may develop
Grout vs Sealant
| Feature | Grout | Sealant |
|---|---|---|
| Purpose | Fill joints | Block water entry |
| Location | Between tiles | Corners and edges |
| Flexibility | Low | High |
Common Errors
- Using too much water during cleaning
- Not sealing natural stone tiles
- Ignoring curing time
In one case, grout was applied within hours of tiling. The result was uneven joints and loose tiles. The entire floor needed rework.
Patience during this phase ensures the final finish looks clean and lasts longer.
Conclusion
Installing a bathroom tile floor requires careful steps, from preparation to sealing. Each stage builds on the previous one. When done correctly, the result is durable, waterproof, and visually clean.



